For anyone who's new here, and hasn't read my blog; I work at a daycare taking care of infants. My current charges range from 12 months-18 months. Because I am the teacher, it is up to me to come up with, plan, and execute all projects and parent gifts for holidays, such as Mother's Day. I figure the best gifts a day care child can give is one they made, since that's the only way it will really have meaning. I love my little rascals to death, but art....well it's not their strong point because they are so young. My oldest can grasp crayons and pens, and he loves to color, but none of the others have that figured out yet.
As I was waiting for something really cool to hit me, I realized that it was Friday. Mother's day was Sunday. Crap. So I racked m brain for easy, simple, cheap projects. I remembered one I had seen on Pinterest, and decided it was my best bet, so off I went to the Dollar Store on my lunch break to pick up some frames and some cute wrapping paper (I ended up with a zoo paper, to match my zoo themed nursery room).
After my little love bugs had woken up from their naps, I took plain paper and some paint pads (also purchased from the Dollar Store), got their hands inked up, and then pressed them onto the paper. They were not very happy about this, and let me know it (it was fussy day already anyway -.-).
Little note, keep an eye on babies during this. if you don't this WILL happen
she rubbed it alllllll over (on the walls too, yikes) anyway- it turned out like this
Showing posts with label Projects. Show all posts
Sunday, May 12, 2013
A Comedy of Errors- The Second Chance Lamp
Not all of my tutorials go well. Some are complete failures. This post is about two such projects and how I fixed them.
A while back, I decided that I needed a lamp for my bedroom, and none of my old ones fit my new decor, So I decided to look for a new one. I saw on at the DI when I was donating stuff, but it wasn't for sale yet, and that made me sad because I fell in love with it.
I pined for it for awhile, and looked for something similar,but ended up giving up (partially because I'm lazy and partially because those lamps are around $60+) and instead finding a beautiful little lamp at Walmart.
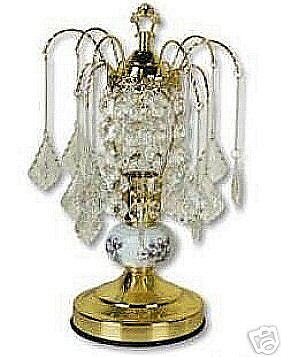
When I say beautiful, I mean the BASE was beautiful. The shade, however, was an entirely different story. It was ugly, and I really wanted something chandelier-ish. So, I decided to make it. So I picked the seam at the top out
and removed the fabric from the frame, leaving just the "bare bones"
after that, I began to string beads, much like I did for my chandelier tutorial, but using pearls instead. I hated it. I only got like 6-8 strings attached, but it proved to be a ton of work, and the result looked kind of
enough beads, and I ended up getting frustrated and hiding the whole thing away in the closet.

I was shopping at one of my favorite stores, Rue 21 and I found this awesome top, but it was too big for me by a long shot (The shirt was an XL, and I'm a small. In these pictures, I had the back pinned so it looked tighter.) Well, I decided that I would do a quick t-shirt re-construct and use a no sew method to make the shirt fit better. The night that I finally got around to doing this, I was really upset at one of my friends who had cancelled out plans on me last minute. Since I suddenly had nothing to do, I decided to work on some of my "To-Do" projects. I measured how much I needed to take it in and cut a strip down the middle, removing what I had marked as "excess material".

after that, I cut slits in either side, and began to tie the strips together, binding the back back up
It was all going really well, until I got about mid-back, at which point I realized the material was double thick, leaving me with some ties that were too long and others that were way too short. I thought it would be ok, and so I continued to tie them together. It looked ok, but when I tried it on, it was way too tight and wouldn't even go oer my head. I tried to loosen it, but there was no real hope. I realized that I was going to have to put a new back on it, which really frustrated me. I was so upset, I wadded the shirt up and threw it into my closet and let it just chill on the floor (Moral of the story, don't work on technical things while angry).
Then I took some fishing line and a needle and sowed all the way around it, sewing the flaps down, and to the rest of the fabric. This was for three main reasons. 1. It was more aesthetically pleasing 2. The fabric wouldn't be able to slip or fall and 3. so that none of the fabric could touch the light bulb and cause the lamp to over heat or start a fire.
A while back, I decided that I needed a lamp for my bedroom, and none of my old ones fit my new decor, So I decided to look for a new one. I saw on at the DI when I was donating stuff, but it wasn't for sale yet, and that made me sad because I fell in love with it.
I pined for it for awhile, and looked for something similar,but ended up giving up (partially because I'm lazy and partially because those lamps are around $60+) and instead finding a beautiful little lamp at Walmart.
When I say beautiful, I mean the BASE was beautiful. The shade, however, was an entirely different story. It was ugly, and I really wanted something chandelier-ish. So, I decided to make it. So I picked the seam at the top out
and removed the fabric from the frame, leaving just the "bare bones"
after that, I began to string beads, much like I did for my chandelier tutorial, but using pearls instead. I hated it. I only got like 6-8 strings attached, but it proved to be a ton of work, and the result looked kind of-Story 2-

I was shopping at one of my favorite stores, Rue 21 and I found this awesome top, but it was too big for me by a long shot (The shirt was an XL, and I'm a small. In these pictures, I had the back pinned so it looked tighter.) Well, I decided that I would do a quick t-shirt re-construct and use a no sew method to make the shirt fit better. The night that I finally got around to doing this, I was really upset at one of my friends who had cancelled out plans on me last minute. Since I suddenly had nothing to do, I decided to work on some of my "To-Do" projects. I measured how much I needed to take it in and cut a strip down the middle, removing what I had marked as "excess material".
after that, I cut slits in either side, and began to tie the strips together, binding the back back up
It was all going really well, until I got about mid-back, at which point I realized the material was double thick, leaving me with some ties that were too long and others that were way too short. I thought it would be ok, and so I continued to tie them together. It looked ok, but when I tried it on, it was way too tight and wouldn't even go oer my head. I tried to loosen it, but there was no real hope. I realized that I was going to have to put a new back on it, which really frustrated me. I was so upset, I wadded the shirt up and threw it into my closet and let it just chill on the floor (Moral of the story, don't work on technical things while angry).
-Happy Ending-
So now I was stuck with two utter failures. -.- but while I was shopping at Rue just a few weeks ago, I found that same shirt, but in a small. So I bought it and decided to use the ruined XL one for something else that needed some glitz. Yesterday I was fiddling around with the fabric, and wondered what it would look like with my lamp. A few minutes later, I pulled the lamp shade form out of my closet for the first time in months.
First, I took some fabric scissors and cut the back and liner off of the shirt so that I was left with a piece of fabric like this.
Then I draped it over the frame. I decided to g this route because sewing is not my strong suite, and I was worried I'd screw it up if I tried to make this into a form fitting lampshade. Plus, I think it looks pretty cool this way, and I'm all about dramatic and unique things. Once I had it arranged in a way I liked, I cut an X in the top, making four flaps. I folded the flaps down into the opening of the lamp shade form, like so.
Then I took some fishing line and a needle and sowed all the way around it, sewing the flaps down, and to the rest of the fabric. This was for three main reasons. 1. It was more aesthetically pleasing 2. The fabric wouldn't be able to slip or fall and 3. so that none of the fabric could touch the light bulb and cause the lamp to over heat or start a fire.
The final project ended up looking like this (Though it looks better in person honestly)
Monday, April 1, 2013
Laptop Make Over
Every one knows that I've recently become obsessed with glitter. The other day, I decided my laptop was boring, so like everything else, I decided to smother it with pink glitter.

My phone takes terrible pictures >.< anyway, my laptop is black with a subtle hint of sparkle. First I removed the little owls from the corners, then I used a Wipe n' Clear wipe to get all the oils and residue off my surface.

My phone takes terrible pictures >.< anyway, my laptop is black with a subtle hint of sparkle. First I removed the little owls from the corners, then I used a Wipe n' Clear wipe to get all the oils and residue off my surface.
after that I used the same two nail polishes I used in Glam Keys and Glitter Charger , I mixed them together, grabbed a brush and began to pain the sparkles on. I was almost out of nail polish at this point, so I went with a jagged design so that I could add more later.
I let this dry for about an hour. I did not add a clear coat, since I intend to buy more nail polish and finish glamming it up.
Saturday, March 9, 2013
SteamPunk Bag
For the con, I'm wanting a bag for to carry around for snacks, money, ID, water bottles, my camera, phone, and things that I buy. I don't want the bag to distract from my costume however, so I needed to find something that would be a bag my character would carry. I was wanting something large, slouchy, and over-the-shoulder- across-the-body (like a messenger bag). My searches at the DI were coming up nil, and I was starting to think I might have to make it myself, until I found this.

It was not as big as I wanted, and the material was different from what I'd been imagining, but it had some good features, was sturdy, and the leather would go with my outfit just fine. The strap wasn't very long but it could kind of adjust- so I bought it. It was very plain, so I decided to doll it up. I had bought a "Leveling Kit" from Walmart, I used that, upholstery nails and plumbers chain to decorate the bag.
First, I attached a hanger thingy to the handle of the purse with hot glue, then I poked upholstery nails through the holes, used a hammer to flatten the sharp end down, and secured it with hot glue. I then hooked the chain to a hook on one end of the purse strap, ran it through this loop, through the loop already on the bag handle, then used an old earing to attach to the other end of the handle.

Once again, it is completely impossible to craft anything without the help and supervision of a certified cat.

It was not as big as I wanted, and the material was different from what I'd been imagining, but it had some good features, was sturdy, and the leather would go with my outfit just fine. The strap wasn't very long but it could kind of adjust- so I bought it. It was very plain, so I decided to doll it up. I had bought a "Leveling Kit" from Walmart, I used that, upholstery nails and plumbers chain to decorate the bag.
First, I attached a hanger thingy to the handle of the purse with hot glue, then I poked upholstery nails through the holes, used a hammer to flatten the sharp end down, and secured it with hot glue. I then hooked the chain to a hook on one end of the purse strap, ran it through this loop, through the loop already on the bag handle, then used an old earing to attach to the other end of the handle.
then I took the level and glued the contraption to the flap of the purse, right over the hidden catch. I hammered those little rabbit ear things down flat. I took some necklace chain and used jump rings to attach it to the included nails that went with the level. I pushed the nails through the fabric, then hammered them down flat.
Finally I put another one of those loop thing on the top center of the flap, and pushed the upholstery nails through it. I ran a chain through the loop, and sewed the chain to the top of the flap on either side. 
Once again, it is completely impossible to craft anything without the help and supervision of a certified cat.
I finally had to pick her up so that I could get a picture. She didn't think that was very nice. Anyway, here's one WITHOUT the cat.
SteamPunk Skirt
One of my co-workers/ friends asked me to go to the steam punk convention with them. I'm not really a follower or anything- but it's definitely a cool concept. When I was in high school, I had my heart set on being a fashion designer, and I took tons of classes on clothing construction, fabrics, retail, merchandising, strategies, etc, and competed in the fashion merch. category of DECA. As such, I love clothes. I have a separate closet in my house where I keep my costumes/props and I'm always looking for something new.
When I started researching steam punk clothing, I fell in love with the rich fabrics, the amazing detail, the diversity and the old, Victorian style of it all. This is definitely something I could embrace. So, I went to my local thrift store of choice, the DI (Deseret Industries. This is a LDS church owned thrift chain that doesn't have sales tax). DI is a thrift chain, so they have them in all sorts of places, but it can be hit and miss. Some stores are really good, like mine, and others have nothing of
value- that has to do with the neighborhood they are in and the donations they get. You can find some REALLY amazing things there (I'm talking things worth $500+ dollars that you're parents get you for Christmas for $75. (It was one of those cultured marble globes for anyone who's curious :p)). Anyway, I combed the DI and found tons of perfect/tweakable clothes. One of my finds was this skirt
I really like the runching at the bottom, and I thought that it was adjustable, so that I could change the length of the skirt. Unfortunately it wasn't. I searched and searched for a tutorial on how to make it so that it was (the most common name I could find was saloon skirt, since what I was trying to achieve was NOT a bustle, even though some people called it that. That's not what it is). There was nothing. absolutely nothing. I found a couple tutorials on how to make the skirt from scratch, but all of them were overly complicated and difficult to follow (and I sow like a kindergartner), so I decided to McGuiver it. Now in all the tutorials I saw for making the skirt from scratch, they talked about sewing special "channels" for your ribbon, but I can't sow, so I tried a multitude of different methods to gather and pull up the fabric, none of them worked. I started to pick off the ugly ribbon on the skirt, when I realized that the ribbon was only sown at the edges, leaving a little tunnel that I could run the ribbon down. Yay for someone else doing the hard part!
I threaded an extra large needle with some yarn, and poked a hole in the top of the inside part of the skirt, pushing my needle into the tunnel. at the very bottom, I pulled the needle back out and tied a knot in the yarn, on the inside so no one would see it. This made the skirts length completely adjustable, so that I could leave it long, or pull it up shorter, making it more bunched and dramatic, and better for layering (which is my plan). I can also adjust each of the six panels individually.
After that, I started to make it more aesthetically pleasing. This particular skirt had a drawstring waist band, with ties one both sides. It was hard to adjust, and kind of ugly, so I pulled the drawstrings out.
Any seamstress or crafter will tell you that it's impossible to create anything without at least one cat present. (My friend asked me how it was going, so I sent him this picture >>)
Once the "boss" has inspected your work for quality control, chewed all the ribbon, batted the spools around the room, taken a nap on your project, and then leaves to take a lunch break- you can go back to work.
I threaded my extra large needle with some thick burgundy ribbon, and threaded it through the waist band. I decided to only use one ribbon, so that I would have a bow on one side. I'm not usually a fan of A-symmetrical looks, but in this case I thought it would make the outfit look more balanced and interesting- and less frumpy.
Once I had that done, I began to decorate. For this project, I decided to use creamy beiges with pops of burgundy. I bought a special ribbon (the white one in the right hand corner of the picture on the left), but it was a clearance ribbon, and there was only one roll. When I ran out, I improvised and used some black lace I had on hand for the sides. I used liquid stitch for this, so everything is held on with adhesive, not needle and thread. Later, I will go back and secure the bows with a few stitches.

Pearl Letters
I love monogrammed things- but I hate the stupid "letter wreaths" that you see all over the place. to me they always look cheesy and country-bumpkin. Well while I was on pinterest I found this
amazing looking letter- but there was no tutorial to be found- So I decided to make it up. There's a few things I would have changed about mine- but I'll cover that as we go.
I got my letter from Micheal's Craft, I wanted something really big, so I got the biggest letter they had, which ended up being something a whole lot more 2D then the one in my inspiration. If I were to do it again, I'd get the more 3D one, even if it meant my letter would be smaller. Also, the inspirational letter was painted gold before hand. I skipped that step, but I think I would have been happier with my result if I hadn't.
For my letter I used hot glue. I found that this worked better than any of the other epoxy i had, though I ended up using a LOT of glue.

I tried two different methods of attachment. First I tried neatly arranging the pearls, and then I tried just scribbling glue onto the letter and dropping the pearls on, letting them stick however they wanted to. I liked the scattered look better- but as I got closer to being done it left some blank spaces that I didn't like. I think it would have been ok if my letter had been painted goldI got my pearls at Micheal's at well, and if I decided to do this again- I would get a better variety of pearl with a wider range of colors.
Once all the pearls were glued on, I went ahead and colored the edges gold using a sharpie and a gold leafing pen. In retrospect, even if I didn't paint the letter (which I still think would have been better), I should have done the edges first. I kept accidentally nicking the pearls, or struggling to color over some excess glue- or worst of all, knocking pearls off.
I trimmed the ribbon up, and tada.
Subscribe to:
Posts (Atom)